Friday, October 28, 2011

First Rebatch- Lavender Spoon Swirl


So, it seems as though the soap gremlins have hit my house for the first time... Maybe it's because I got their attention by starting to post videos? So, yesterday morning, the soap was hard enough to unmold but not yet hard enough to cut, so I let it sit until the evening, when I tried to cut the first piece off... nope, still too soft to cut. So, I let it sit for a couple hours more.
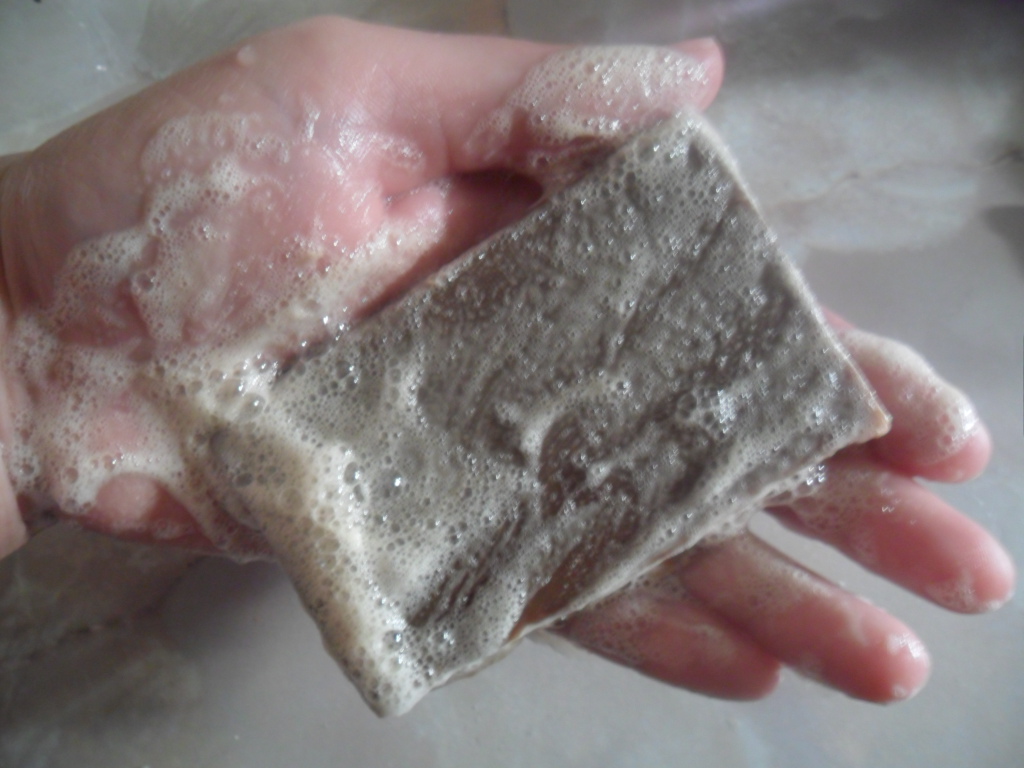
I put lil' man down for bed and went and checked on the soap again. To my horror it had started to sweat profusely!


Now, in the past, the only way I had to test and see what the sweat is, is to stick my finger in it and see if it burns. I am SOOOOOO glad that I had been able to invest in some pH strips... 'cause the pH of that sweat was at 14!!! What?! Soap is supposed to be more around 8 or 9 (water even lower than that) and given that it was only a day old I would've guessed it to be more around a 10 or 11... the test piece that I had cut off earlier wasn't sweating, but was still testing at a 13. Hmm... I think it is finally time I tried my first rebatch and see if I can "save" this soap as it still smelled wonderful.

I pulled out my brand new 2 quart crock pot that I had bought for such an occasion. The crock pot is small, but I work in small batches, so it works just fine for me. First up was donning on some gloves and chopping up the "soap" into small chunks and putting it into the crock pot. I wanted to cry 'cause the swirls had turned out to be rather pretty.


You can see that the soap was incredibly soft and gooey in the middle, but I didn't come across any lye pockets, thank goodness. I turned the crockpot onto high for the first 15 minutes so that it would heat up fast on me and then turned it down to low. The soap sat in the crockpot heating up while I watched the last episode of Merlin season 3 (what an excellent show! I can't wait for season 4 on Netflix!) and the first episode of Army Wives season 5. All in all, about an hour and a half, getting up every so often to give the soap a stir so that the stuff on the bottom didn't burn and the stuff on the top had a chance to melt.


The entire batch was the consistency of really thick applesauce or thin mashed potatoes by this point. I tested the soap once more and it was at a 9 on the pH level. So much better! It was also an ugly gray color. So, I attempted a swirl by adding titanium dioxide into the entire batch to lighten it up just a little bit and then separating a couple spoonfuls of the soap into another container and adding more purple colorant to it.

Then, I made a divet in the center of the soap that was in the crockpot and spooned the colored soap into the divet. I folded the two colors together a couple of times to get a "swirled" effect but not so much as to actual homogenize the colors together. Then I stuffed the soap into one of my silicone molds (ok, well, it's the only big sized silicone mold I own right now).


You have to be careful with the soap at this point because it is very hot and still is thick enough to where it needs to be pressed into the mold. Heat resistant gloves are a good thing for rebatching ^_^;; Once the molds are filled up you let them sit and cool for several hours and unmold once they're cool and hardened.


I'm happy that the fragrance had survived the process but the final results just aren't my cup of tea... especially for giving as a present to someone. So, in the works now is processing the soap a third time. Wish me luck!

Thursday, October 27, 2011

Lavender Spoon Swirl

Hello again! Wow! I know! Two soaps in one week?! It's a big change from the past month of absolutely no posts :( I'm just trying to get back into my grove, so before I get onto the soap, I have a couple of things to let you know. What I'm working on right now are my Christmas gift soaps, so once this frenzy is over, my soaping posts will be slowing down as I already have a ton of soap I need to get through! Also, I am going to be offering videos on YouTube showing my soaping process. So, you get a choice: watch a video, or read about the process here ('cause I know some people can't watch YouTube). Even though I'm going to have to start soaping a little less when I'm done with the Christmas soaps, I'm still going to be posting my other crafting/art projects here. Eventually what I plan to happen is to make DelightfulU my crafting/art blog and move my soaping experiments to a new blog under a new name as I start preparing to put together a business. Bad news... business won't be up for a couple years yet, so you'll just have to wait ^_~

So, now on to the soap!
First the video if you don't want to read through everything below.

This is my first attempted spoon swirl, something that does seem to be rather popular right now. My inspiration is actually based on a fiber roving I had purchased earlier this year from a wonderful lady on Etsy, handmadehandmaid.

Heard it Through the Grapevine roving

I love the color pop of the black and white and a touch of purple :)

Basically with a spoon swirl, you divvy your soap into different bowls, one bowl for each color you want to use (you can use as many colors as you would like, I did three). Then, the easy and fun part: spoon your soap into your mold! You want to make it random and don't worry about covering the bottom of your mold with the first couple of spoonfuls. Here are some pictures:


And then finish the top off with a nice swirl :D


This soap has 75% olive oil, coconut oil, cocoa butter, castor oil, and palm kernel oil flakes and is scented with my first psuedo-EO fragrance... Lavender with a bit of Patchouli and hint of Peppermint. But I found out that the Patchouli was really taking over the Lavender so I decided to add in a bit of Lavender Gardens Cybilla FO to help round it out and pump up the lavender scent!

I will hopefully be able to get some cut pictures posted later tonight or tomorrow! I'm really excited to see how this turned out!

Tuesday, October 25, 2011

I made soap. And a video. At the same time.

So, haven't posted in a looooong while... haven't soaped in forever :( So my soaping mentor kicked me in the b.u.t.t. and gave me a challenge. Part of the challenge was a video... so here you go: my first full on soaping video! It's long so make sure you have your cup o' coffee made and at your desk before watching!

Tuesday, August 30, 2011

Soap Scents- Pt. 1 The Good

Hello again, everybody :)

I guess you've already figured out that I was not selected by BrambleBerry to test out their new fall fragrance oils. That's alright, though, because I still get to read the test results of the soapers who were chosen! Just as much fun, and much less stress ^_~

Today I have decided to have some fun of my own and go back through a bunch of soaps that I made back in April to see how the scents have behaved! Most of the soaps are M&P with a few CP thrown in there as well, and all scents unless otherwise noted are from BrambleBerry! I have decided to break this up into 3 sections: The Good, The Bad, and The Ugly, so stay tuned over the next couple days as I go over each of the scents I have previously used!

Let's start off with The Good:
Celestial Waters Cybilla FO

Still smells as strong as the day I made this soap! It has a unique smell all of its own that's kind of hard to describe. It reminds me of sweet water and honeysuckle... almost a clean scent with a couple of heavier sweeter notes to it. I also don't see any signs of discoloration!

Lavender Bouquet Cybilla FO

No discoloration is noted once again and it stills smells lovely. A deep floral lavender (as opposed to herbal lavender) with other very subtle floral notes. It does kind of remind me of grandma type perfumes, though.

Energy FO

A fun and strong fragrance. I detect just a hint of citrus, some light powder, and something a bit sparkly. The colors in my soap are still bright as ever with this one!

Apricot Freesia FO

A beautiful light scent that has stayed strong with minimal fading. It's definitely a bit heavier on the floral Freesia right now but the Apricot fruit is still coming through nicely. And once again, I am not seeing any discoloration :)

Eden's Garden Cybilla FO

The floral notes in this scent has really stuck around, although, I would have to say that the top notes of citrus have faded just a bit transforming this scent ever so slightly. It's still a pretty scent that's not overpowering and doesn't discolor.

Black Tea FO

This scent isn't for everyone. It's really heavy and musky... but I guess that's one reason why I like it, hehe. Personally I think it smells awesome! And it sure has stuck in my soap and a little bit goes a long long way. I believe this was soaped at less than 1/4 oz per pound of M&P... it does discolor to a light tan and all those dark blotches on top of the soap is simply the black tea leaves I had added to the soap, so no worries about that!

Chocolate Espresso Cybilla FO

Ok... this was my first ever CP batch of soap. And I am so happy that this scent has kept! I actually use it as a deterent for eating chocolate! I'm a chocoholic, so I get these cravings, you see... so, instead of reaching for the nearest chocolate bar, I reach for this chocolate soap! The scent it leaves on my hands is delicious enough to stave off my craving! Woot! Love love love this scent and just put in my order for more ^_^ And yes, this will discolor, but I don't know how much seeing as I colored this bar with... you guessed it! Hershey cocoa powder ^_^ Yum yum yum!

and my last FO review for today is
Oatmeal, Milk, and Honey FO (not the Cybilla type)

Yet another yum scent that has lasted :) I'm sad that I'm already on my last bar! Smells of cookies and sweet things to me, which it should. This scent has discolored ever so slightly a very light tan which surprised me... I thought it would go much darker than it did!

So there you have it... part 1 of my Good, Bad, and Ugly Series pertaining to the FOs I have currently tried! Thanks for reading!

Sunday, August 28, 2011

The wonders of a failed experiment

You just can't win them all... to date I have yet had an unsuccessful batch- unsuccessful meaning something went terribly wrong with my soap experiment... so today I have the pleasure of sharing with you my first very unsuccessful batch! Lucky you!

So, I tried my first Mariner's Soap. What is that, you ask? Simply put, it's a salt bar with 100% coconut oil superfatted at around 20% so that it is less drying to your skin and it's supposed to be a very bubbly exfoliating bar that works even under hard water. Everything was going pretty well, I was able to soap at around 104 degrees since that's how hot it was outside yesterday... very simple- I stuck my lye solution and my coconut oil outside and let the temperatures regulate to the outside temp! Woo, this heat is good for something! Mixed my soap up, added the coloring and fragrance (a very piney fragrance called Mistletoe from WSP), mixed in my Epsom salts at a 1.5:1 ratio (I've seen recipes that added up to 2:1 salts!), and poured it all into my silicon soap mold that got bent out of shape during shipping, grr! I even tried doing a pencil line that my friend Emily over at ShiehDesigns is so good at!

I then covered my lovely soap and left it alone for many many hours. I had heard that salt bar soaps need to be watched and cut at the exact correct time or else they become too hard to cut... Finally, after many checking ins, my soap felt hard enough to cut. So I uncovered the soap and to my dismay I found pools of water sitting on top of it! No- literally, I could have gone swimming in it! O.O!! See?

Well, unfortunately I do not have pH strips here at home with which to test the pH levels of the clear liquid (bad me, I know) to see if my batch had separated underneath the pretty green color. So what else was a girl to do but take the soap next to the sink turn on the water and then stick her finger into the offending substance? It tingled a bit when I left it on my finger, but didn't burn and felt a little slippery. (I should probably put in a disclaimer about not trying this at home or yadda yadda, but if you're already making or thinking about making soap you already know the dangers entailed and are old enough to make your own decision on whether you choose the possibility of maiming yourself!)
Anyway, I let the soap log sit for a while to see if the water would seep back into the soap while I did a quick search on the internet to find out what happened or if I should be worried... I found some information that I will divulge shortly.

I went back over to my soap and was very happy to see that the liquid had dissipated (woo! yay! hooray!) and proceeded to unmold it. Ummm... it sorta fell apart on the bottom in some places...
And this happened when I cut into it...

Looks interesting... but doesn't look or feel like any soap I've ever seen o.O!
So erm...
A couple things went wrong here:
#1- I used Epsom salts. Apparently salt bars don't do so well when Epsom or Dead Sea Salts are used... I just found that out here (hint: look at the very last post that was made)
and
2) I used waaaaaaaaaaaaaaaaaay too much salt!

I don't mind that it turned into a failed batch technically 'cause colorwise, it looks more like a watermelon than a sprig of mistletoe... my color ratios were completely off!

My lessons are learned. I now know what not to do... so hopefully my next try at a Mariner's bar will be more... try-umphant! (and yes, I went there... I'm in a silly mood today!)

I am going to save today's experiment and throw a bit under some bath water in a couple of weeks to see if it will make a bubbly salt bath (sounds nice, doesn't it?). I will let you know how that goes! And thanks for reading ^_^

Castile with Coconut Milk

Here's another soap I made a while back, well, a couple days after I made the Castile in the Nude soap. I decided to try the 100% virgin olive oil with coconut milk as part of my liquid for the lye solution. Coconut Milk is pretty big in the cosmetic world with claims of it containing anti-fungal, anti-bacterial, and anti-viral properties (because it has a high count of fatty acids) and that it contains vitamins A and C, Calcium, Iron, and natural proteins and is a wonderful additive for sensitive skin-types.

However, when I tried this soap a couple days after it was made, I found that I just could not get it to lather any bubbles. "How could this be?!" I thought. "Coconut milk is supposed to be high in fat and sugar content which should lead to a bubblier bar of soap than the castile I had previously made with just water!" So, I did some research and I found out that I need to find an organic store around here... the coconut milk I had bought at the local grocery store has added water and guar gum to it which may be affecting the lather. Plus, I soaped at a high 38% liquid content with only the 8% being the coconut milk (the other 30% was distilled water). So, tonight, I gave it another go. And I got bubbles! And a decent lather! Yay!

Hopefully, as the soap cures longer and longer it will get bubblier and bubblier *fingers crossed* Apparently, a soap bar gets much better with age as long as that pesky DOS doesn't settle in to ruin it all. I am really happy to announce that none of my soaps since I've started have come down any type of DOS *knock on wood!* And most of the scents I have used have stuck around nicely.

Anyway, I digress... back to the Coconut Milk Castile.
Again, I added no fragrance or coloring and stuck with a simple decorative swirl on the top. What do you think?

I love the cream color this soap turned out to have and once again, that lovely aromatic nutty scent from the olive oil is beautiful (well, to my nose, anyway, hehe!) Still, it does make my hands feel really nice and smooth. It just needs a bit more tweaking to get it where I would like it :)

I do want to try this again using only coconut milk for my liquid... And now that I have found the wonderfulness of honey- I think my next castile batch will be made with true coconut milk (if found) and a bit of honey... maybe I should just go for it and add some ground oats to make a natural oatmeal, milk, and honey bar... or maybe I should try a mix of chamomile tea and coconut milk for my liquid content and still add in the honey so I can have a tea, milk, and honey bar? Both sound yummy good to me, how about you? Maybe I should just make both types and see how they fair against each other! For now, it's off I go hunting for organic 100% coconut milk. Wish me luck!

Friday, August 26, 2011

Spa Tonic Chamomile Bastile Soap


Hi everyone!
So, I made this soap a couple weeks ago... but ended up hating what the fragrance morphed into and how the swirls turned out... so, I thought it was not going to be worthy of a post. That is until I actually used it! I'm in love with this recipe!

So, we'll start off with the recipe- it's called a bastile because it's mainly olive oil but has other oils introduced so it can't be called a castile soap (which is 100% olive oil).
85% olive oil
10% coconut oil
5% shea butter
chamomile tea for my liquid
1 TBS honey per pound of oil

Look at how lovely this thing lathers up! It bubbles right away and the feeling of my skin afterward is pure silk! It must be the honey :) I just can't stop touching my hands!


And this next picture shows the swirl in the soap after it's been used... looks a bit better than the just cut soaps, but it's still not what I was looking for for the swirl.


I was looking for a much bigger and spread out swirl... I poured in my colors (the base is uncolored, part colored with ultramarine blue that turned green, and part colored with black oxide which turned dark green) at a barely there light trace... I mean, the soap was barely making any marks on itself when I lifted my stick blender out of the soap to check for trace. And the scent I used was WSP's Spa Tonic which is a blend of green tea, aloe, and lemon. It smells amazing out of the bottle- nice and soothing- but for some reason it turned into a really bad (to me) citrus smell and none of the green tea scent comes through :( I do have to say that it does take on a more pleasant scent on my skin, though... perhaps the 0.9 oz/ppo I used is way too much for this scent. Next time I try this, I'll nudge it down more to 0.5-0.6 oz/ppo and see if I prefer it better as a lighter scent for CP... otherwise it just may find itself going into bath bombs or lotion! Who knows... I will not give up on this OOB scent :)

Friday, August 12, 2011

Bramble Berry's SOAP Panel- Fall 2011

Hi everyone!
It's that time of the year for Bramble Berry to pick out a small panel of soapers to test out their new fragrances for their shop! This past spring my good friend, Emily over at Shieh Designs, was picked to participate on the SOAP Panel and she had so much fun! Check out her final results by clicking on the following image!


Bramble Berry is the first soap store I have ever used for soaping supplies. My very first purchase included their Swirl Soap Kit and a two pound batch of their Oatmeal Melt and Pour (I really wish they would bring this product back!!). I recently have been stepping out and trying other supply stores but these other stores just can't compete with the quality of products and customer service over at Bramble Berry. I always highly recommend Bramble Berry to any new soapers on the various forums I belong to and here's a couple reasons why:

I absolutely love their Melt and Pour bases! I would have to say that their Aloe Vera and Shea butter M&P bases are just top notch. They have great lather, lots of bubbles, and leave my hands feeling silky smooth. The best part about these bases is that they don't contain many of the chemicals that bases from other soap suppliers do!

Aloe Vera M&P...............Shea Butter M&P


I'm also in love with their fragrances (though I haven't been able to try their essential oils, yet). All of the fragrances that I have bought from Bramble Berry are super strong smelling out of the bottle which is something that I prefer! Bramble Berry may not have quite the fragrance oil list as some other suppliers but because they test their products through their customers first (ie. SOAP panel), they are able to pick and choose the best fragrances to add to their product line! This also allows them to put down information as to discoloration, acceleration, fading, etc. for each of their fragrance products- something very useful when deciding which fragrance to buy!

However, I think my most favorite thing from Bramble Berry (and most helpful) is their blog SoapQueen, forum teachsoap.com, and their internet videos at SoapQueen TV. These sites are stuffed full of invaluable information for business-makers, new recipes and techniques to try out, and if it weren't for Anne-Marie and her wonderful instructive videos I probably wouldn't have had the guts to even try M&P soaping let alone CP soaping!!

I may be new to the soap-making community (my first M&P batch was in April and my first CP batch was in May) and, like many soapers, it was love at first batch but I've spent every day since then learning new tips, tricks, and techniques that aid in this new addiction -er, hobby with which I hope turn into a business some day. However, I would definitely had not gotten as far as I have without the help and great products from Bramble Berry. I will be a customer of theirs for life and wish to give something back by helping them pick out the best fragrances in this SOAP panel! Thank you Bramble Berry!

Uranus M&P Soap..................Goat's Milk CP Soap

Monday, August 8, 2011

Soap Displays... found!

I had a very lovely long weekend with my mother-in-law who came to visit! I must say she was a godsend in helping to entertain the little man while I got some extra cleaning done, yay! We somehow ended up at Hobby Lobby on Saturday and I ended up finding and picking up a couple of awesome pieces that I think will look great for showcasing soap whenever I start going to craft fairs/shows! What do you think?


With some soap, just to show the size of the pieces. I'm definitely going to have to fiddle around to find a way to display my soaps:

As you can see, the tower on the left isn't wide enough to fit my soaps! Oh no! I'm going to have to shave my display soaps down about 1/4" so that they fit properly into it ^_^;;

And my favorite find! Miniature bath tub! Isn't it cute?!


I know that right now these items don't seem to fit the colorful image of this blog... I've actually been working on a redesign... something that will prove to be a little bit more label-friendly and incorporating a more black, white, and red theme (but since tons of people are already doing those colors I am trying to take it to the next level). I'll have more updates on the theme change as I get closer to perfecting it and get closer to launching it officially on the blog ^_^

As always, thanks for looking!

Wednesday, August 3, 2011

Demon (Oni) Soap


So today I have for you the last batch of soap I made over the weekend and this is my trial run of what I will be calling my Oni Soap (Oni = Demon in Japanese). I tried to go for a specific look and my friends didn't see it until I told them about it... boo! But maybe you guys can see what I was going for! Do you see the Demon eyes in this?

It is scented with Dragon's Blood FO and has an added spicy kick of a super secret FO that only one other person knows about because, well, she's the one who gave the FO to me ^_^ Together they make this really nice deep spicy masculine scent that I just absolutely adore!


I accidentally added a bit too much black oxide into the mix and so my bubbles are coming out a very light grey color... not harmful, but I'll know next time that I don't need to add so much color. I'm really liking oxides though because they color the soap so easily! My red even looks red and not pink! Woot! I had separated the white part from the rest of the batch before adding the FO because the FO will discolor to a dark brown over time, so I'm expecting the red to become a deeper brown-red over time ^_^

This recipe is proving to be really nice and needs a little tweaking, though I may try upping my SF from 5% to 7% and see how that affects the moisturizing levels... right now it has a conditioning number of 56 which is one of my highest in the soaps I made :)

Thanks for looking!

Tuesday, August 2, 2011

Pomegranate Lover soap


So, in trying to come up with a concept for a completely different soap which I knew I wanted to use Nature Garden's Champagne Pomegranate fragrance (I'm still working on designing that soap, though), I came across an idea for an all Pomegranate soap!

This was a mixture of Champagne Pomegranate FO and Bramble Berry's Pomegranate and Black Currant FO. I used 100% Pomegranate juice for my water content and some of my ingredients include deodorized cocoa butter, shea butter, and Walmart GV Shortening. I absolutely adore the soaps I've made with this Shortening! They feel lovely on the skin! And I believe it's the juice, but these soaps feel really silky smooth even when dry!

Anyway, I didn't use any colorant in this soap as I didn't know the end color result of the Pomegranate juice within the soap. So, I sprinkled some light gold mica on the top and gave it a pretty swirl. The juice turned the soap this weird brownish purple color and as you can see, the suds are also tinted this brown color:


At first, this soap smelled horrible! I was so disappointed :( But it's been a couple days now and the icky smell has been subsiding and letting the FO mixture smell come through and it's starting to smell nicely of sparkly pomegranate ^_^

So far, other than the weird color, I would definitely call this recipe a complete success and I can't wait for it to cure so I can start using it!

Monday, August 1, 2011

Castille in the Nude

In my college art history class (taken long ago) we learned my teacher's view on the difference between nude and naked. Yes, that's right, we had this sort of discussion in class, lol! Since then I have wholly adapted this view (to help sort art history out in my own head) and believe that nudists aren't actually nude, they are naked instead. This is because at one point in time or another, they had been clothed. With this thought in the back of my mind Botticelli's Venus in Birth of Venus is considered a nude painting because within her storyline she had never worn clothes before this point. Meanwhile, other paintings that may be called a "nude" painting, are actually "naked" paintings such as Titian's Danae series. Please be aware that the photos in the links are linked to these pictures which are NUDE and NAKED, so you may not want to click these while at work...

You must be asking yourself now, why in the heck am I talking about these things! Well, it's all for the good of one of the brand new soaps that I tried making this weekend. Plain old castille soap with nothing added to it. No fragrance, no colorant, no nothing. Just 100% virgin olive oil, water, and lye. It's my first naked soap... or so I thought... Since this is actually my very first Castille soap, as per my above explanation on naked vs. nude, this soap is technically a Nude soap ^_^ And hence the name "Castille in the Nude"

Now, before you go yawning on me and saying- oh, it's going to be boring soap, take a look and tell me if this is what you expected my plain castille to look like?


And the top may be a bit hard to see here...

Do you see the swirls?

And now I must answer THE question: How can this be a two-toned castille soap if absolutely nothing else was added to it?!

Well, the thing is that I actually made TWO batches of castille soap and swirled them together! In one batch I used the darkest colored olive oil I could get my hands on and the other batch was created with the lightest colored olive oil I could get my hands on! Wheee! *french accent* I am genius, no? *end french accent*

Actually, I'm sure I'm not the first to come up with this idea and it's far from perfect... I soaped at a 31% water/lye ratio so I could get to trace faster, but for some reason my soap got really hard and flaky and powdery on the outsides (top, sides, and bottom) but remained really soft on the inside. Plus, my swirl on the inside isn't as nice as I would like it to be... but on the whole I'm happy and can't stop smelling it! It has a nice lovely light olive oil/nutty scent to it. So, definitely one to try out again in the future!

Tuesday, July 26, 2011

Ninja Soap Take 1


Hello! So, I've been busy doing other things around my house that I haven't been able to make any soap for a couple weeks now (it's been over a month since my last CP batch, oh no!) My need to feed my soaping addiction got to me yesterday during some 40 minutes of free time before I had to run off and babysit Rachel. I thought I could get it done in that time... it caused me to be a few minutes behind schedule instead, but mainly because my stupid gas burner on the stove didn't light properly, once again. I turn it on, I see the flame, I turned to go work on pouring my oils and cutting my butters, check on the water temperature in my double burner only to find out that the flame had gone out and my stove was instead pumping out gas. So, I had to wait for the gas to dissipate before trying to turn the stove on again. Grr...

Anyway, I have been really excited to try this batch out. It's the first time that I tried some more expensive butters, ie. Shea and Cocoa. It's also my first batch with a little bit of Palm Kernel flakes, Palm oil, and Sunflower oil in addition to my usual suspects (Coconut oil, pomace olive oil, and castor oil). I also decided to try a 50/50 water and coconut milk content for my lye solution! My additives include titanium dioxide (I wanted this to be a pristine white) and bamboo extract with Bamboo Fresh FO from Nature's Garden. I wasn't partial to the scent OOB as I had a hard time being able to smell it, but in the soap it is smelling absolutely fantastic! I hope this one doesn't fade.

The whole theory behind this soap was I wanted it to look rather plain, you know, able to hide within sight sorta thing, but have the power to assassinate dead skin cells and decimate chapped skin when used!

Since, apparently, I have a tough time really being able to incorporate the FO and colorant into already traced soap, I added all my additives to my oils before I added the lye mixture. After the lye went in, the soap went from oil to heavy trace within a minute. I let it rest in the bowl for a little bit wondering if this is what false trace looks like, but it was pretty much time for me to get out the door, so I glopped it into my brand new wood mold, put a random spikey top on it, and covered it with cling wrap and a towel before hastily exiting my house with sleepy son in tow (he had been napping during all of this) and hoping beyond all hopes that nothing would go wrong while I was out.

I got home later that night and was able to check in on the soap. No separation! Whee! A successful batch! Somewhat... I assume it went through the gel phase because I was able to unmold and cut it only 6 hours after it was made! I was unhappy to discover that yet again the colorant didn't get fully incorporated. All my bars of soap have little and big TD spots on them :( Plus, it didn't turn the pristine white I had hoped for.

But, my mold makes me a happy panda- I made it myself, and it worked. I was able to get the soap out really easily which means that I had been able to get it perfectly squared with using my quilter's square, hammer, nails, and wood. Happy happy happy! All of the sides are nailed so it's not one of those fancy shmancy molds that can be taken apart to get your soap out.

So, umm... you want more pictures, right? Here ya go!


The lather :)


My wood mold. There are 3 sections (10", 5", and 6") and it's 3.5" wide and 3.5" tall. I used the 10" portion for my batch size and have discovered that I need to make a slightly bigger batch of soap so that I can get bigger sized bars. The heaviest 1" slice I got from this batch was only 3.9 oz and I was aiming for bars more around 4.0 to 4.5 oz.

With some lessons learned and some questions that still need to be researched (like why it traced so fast! The FO was reported not to really accelerate trace much, so what else could it have been?), I will carry on with my household cleaning and maybe present another batch of soap to you later this week!

Saturday, July 23, 2011

Zack's best friend's Birthday


Happy Birthday, Rachel!!!!


Sewing sewing sewing... I'm not all that great, but I do enjoy it when I get the chance to make some stuff... Typically, I'm best at straight lines (isn't everyone?!) so when it comes to making clothes, I can be put a little off by it... such as, how the HECK do you hem a circle skirt?! I try and I try and I fail every time... but here are some things I did this week that I did not fail at!

Zachary and I attended his best friend's birthday party (she turned 3!) today and she had the coolest pirate theme, so of course I had to make them some pirate-y outfits to wear :D

The back of birthday girl's outfit:


My son's outfit (he wouldn't sit still for a decent photo... this is the best shot I got of it all day, grr, argh!):


And both of them together with Rachel's mommy in the middle holding them in place, lol!


And then, I made one more outfit as Rachel's actual birthday present, and if it looks weird, it's because it's on my son who is definitely not girly at all!

Please don't tell my husband that I took a picture of Zack wearing girl's clothing... he just might maim me for this ^_^;;
Let's see... the birthday outfit was made from McCall's pattern M5836 and the costumes were basically altered white t-shirts, a no-sew tutu, and altered pants. I also stole the red vest from a monkey Halloween costume that my MIL made for Zack two years ago ^_^

We had a lot of fun today at the party and meeting all sorts of new people!

Wednesday, July 20, 2011

Versatile Blogger Award


Awesome! So, yesterday I was given an award! The versatile blogger award to be exact. This award is given from bloggers to bloggers and the ever so sweet and talented Emily over at Shieh Design Studio gave this to me! If you haven’t checked her out yet, I highly suggest you do! She’s also running a contest to win 20 different products from her, so get over there before July 31st and put yourself in to win some totally awesome bath and body products!

So, there are some provisions to winning the award:
1 – Make a post and link it back to the person who gave you the award (and include their website address)
2 – Share 7 random things about yourself
3 – Award 7 recently discovered bloggers with this award and contact them to let them know they have won

So, with number 1 out of the way, we move on to #2 where you get to learn 7 random things about me… a more difficult task than it looks!

1. Every member of my immediate family (well, excluding my 3-year old son) has been or is currently in the military! I was in the Army for four years and loved my job, but it kept me away from my husband (who’s in the Air Force) and child, so I ended up leaving in order to take care of my family. Do I miss it? Oh yes! But I don’t miss the 6:00 am physical training times! Hehe :)

2. I have a B.A. in Studio Art and I can’t draw! Well, I can’t draw to the standard I would like myself to be able to draw at. I focused mainly on glass crafts- you know, mosaic, stained glass, ceramics… but there aren’t any adequate places around here to do any of these art forms. So I adapted and found other arts I could output my creative juices into!

3. My husband is 2 years younger than me! We met while we were in training out in California when neither of us were looking for a relationship. It’s funny how things like that happen :)

4. I love Japanese animation. My first anime was Vampire Hunter D- I saw it during a party when I was in 5th grade and had absolutely no idea what it was or even what the title of the show I was watching was! I didn’t truly find out what Japanese animation was until years later in HighSchool when SailorMoon first came out on Cartoon Network (I’m aging myself with that statement for any of you other SailorMoon fans out there!). My favorites right now: Fruits Basket, Haibane Renmei, Lain, and Hikaru no Go

5. Something really odd about my body: My right foot looks like it has two pinky toes! How to describe it… it’s not like I have six toes on that foot, I only have the normal 5 digits ^_~ but, the toe that’s right next to the pinky toe is the same size as my pinky toe instead of being slightly longer like normal feet. It’s weird, but doesn’t affect my walking!

6. Hubby and I own a lot of guns. We love being able to go out to the range and do some target shooting. Personally, I like a gun or rifle that has a kick to it. I will never own a .22 cal, it goes ping! Give me a .45 any day! My favorite brand is actually a lesser known brand called Hi-Point. They’re not the best looking guns-quite blocky really, but they shoot straight and true and we’ve had the least amount of issues with them!

7. I am a packrat to the nth degree… if I got any more stuff, people might start calling me a hoarder. To date, I probably have about $3,000 in crafting supplies and tools hiding all over my house. I’ve already spent a week trying to organize everything! In fact, I’m having a garage sale soon and whatever crafting supplies I don’t sell off there will probably be put into lots for online purchase in a month or so… I’ve got everything from fabric and needlework supplies, jewelry, stamps, paper, and I’m sure there’s more, but I haven’t gotten that far in my sorting yet ^_^;;

So, now you know more about me than you probably cared to know! Hehe!
Which brings me to the last requirement, which is to nominate and share with you 7 other blogs that I think deserve this award! In no particular order, I nominate:

Shell’s Craft Haven
Beautiful card maker! She uses mixed media to create her OOAK hand-colored cards!
I Sew Cute
Wonderful crafter in various mediums. I love her Ikea hack- it's so girly sparkly!
The Trouble with Crafting
Her hoops are just absolutely lovely and she's constantly challenging herself to create more difficult pieces!
Artfabrik
She makes the most beautiful art quilts and always throws out wonderful tips!
BrinyBar Soap
Her soaps and the stories behind them are always a wonderful read!
Fullamoon Handcrafted Artisan Soap Blog
I love the look of her soaps and she's always trying out new and fun techniques!
Into the Green World
Outdoorsman fun :) I love reading about his excursions into the wild and seeing his creations. The kyobo is coming along nicely!

Tuesday, July 19, 2011

Hair DIY-saster, maybe

So, yesterday, I got the want to start working on my hair... I figured, since I'm not working, I can go ahead and attempt to put some funky colored streaks in my hair (I was thinking blue). But my hair is a really dark brown/black, so I knew I needed to lighten it first. I found Feria brand hair lightener on the store shelves and decided to try it out. So, umm... I'll let the pictures speak for themselves:

Before-


After-


My hair went varying shades of blonde, orange, red, brown, and black... I'm... um... astounded... Well, I wanted funky hair... I just don't know if it's good or absolutely horrible... I kind of like it, but am afraid to try a redye as I ended up losing chunks of hair last night while washing the dye solution out of my hair :( All I know is I'm stuck with this look for a little while at least 'cause I don't want to actually kill my hair by dyeing it again any time soon.